Written by BuyNoir
Last updated: 2021-07-05
When a new user registers his/her account on SAAS Module, a subdomain will be created.
This subdomain consists your username and root domain name of SAAS module. But the user/tenant want to map his real domain with the subdomain as it is an efficient way to access website from customer’s end.
For example: A SAAS Module is running on domain “buynoir.co”. A new tenant came and registers with a username myshop, hence the store name will be “myshop.buynoir.co “. But what he wants is the mapping of his domain name “bigbazar.com” to his subdomain of SAAS module “myshop.buynoir.co “
But before this, if you want to know how to create a CNAME record for SAAS module.
Step-1: Login to Your DNS Management Console
Here, we are using Cloudflare for DNS management. You can use any DNS provider’s service.
If you are managing your DNS through Cloudflare you can log in by clicking this link below:
https://dash.cloudflare.com/login
Learn more how to add CNAME (https://bagisto.com/en/map-tenant-domainwith-cname-in-multi-tenant-saas-ecommerce-module/)
Step-2: Add A CNAME Record
You can add a CNAME record similar to this in the image below:
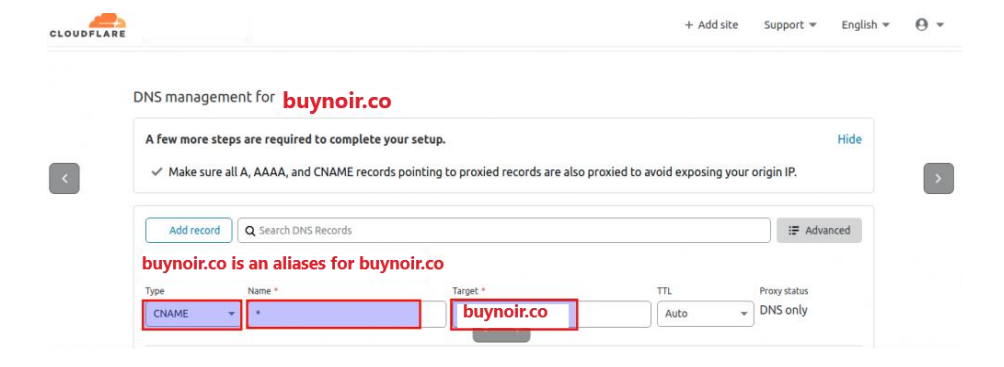
Type: Choose CNAME.
Note: In the buynoir.co replace with your own domain name.
Step-3: Save The Configuration
Click on the Save button. It will save your created record.
Note: Then we need to create a store and configure as usual settings.
We can learn more from here (https://bagisto.com/en/create-cname-record-forlaravel-ecommerce-multi-tenant-saas-module/)
Step-1: Login to Your DNS Management Console
You first need to login inside you DNS Management console and open your domain. Here, we are using GoDaddy (https://in.godaddy.com/) in our use case.
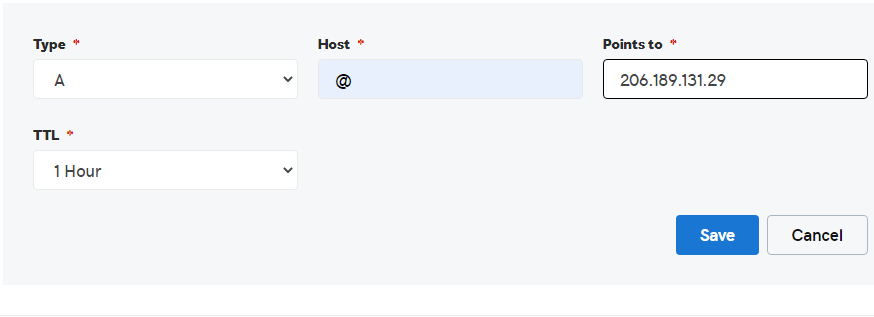
Step-2: Add DNS Record
After logging in, you need to map an A record of your domain with the server IP of SAAS module.
Here the IP of our SAAS module server is (your desired IP). To map our domain (myshoptest.com) with SAAS Module server IP, the DNS entry should be like this in image below.
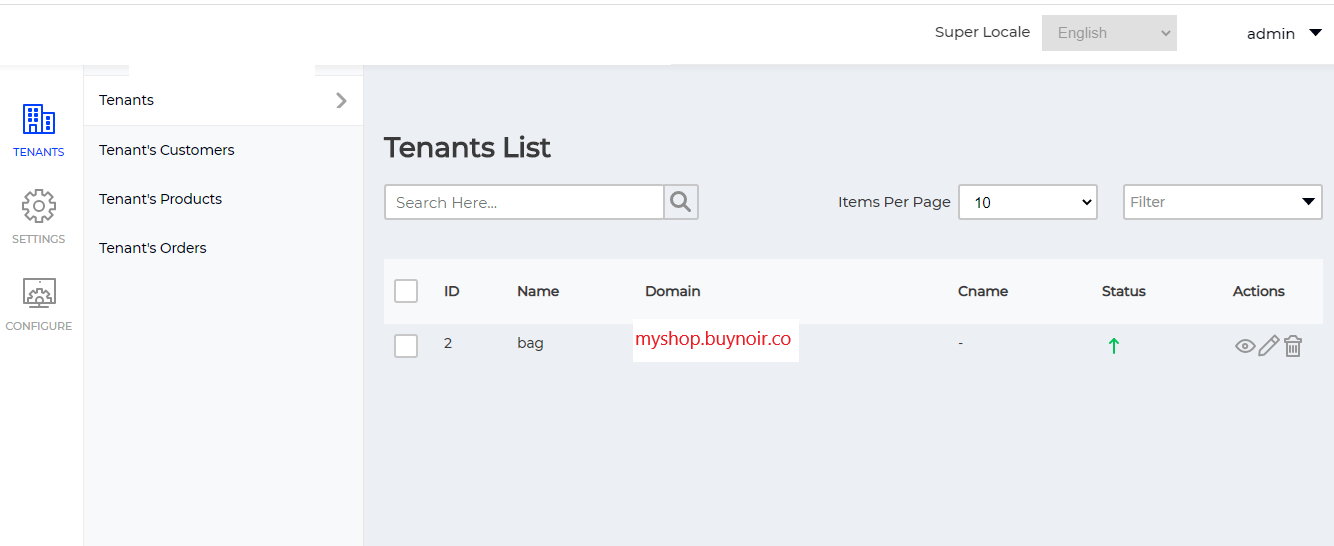
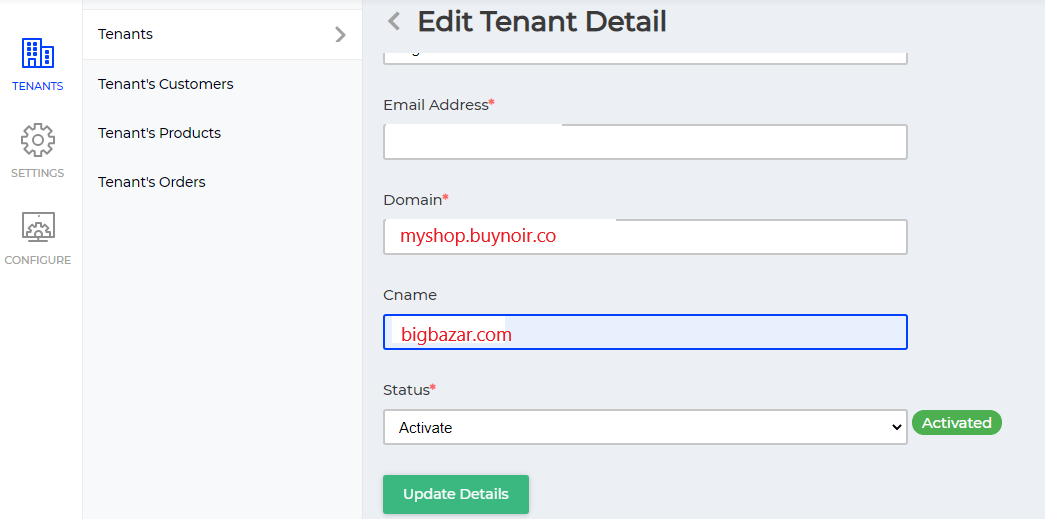
Step-3: Configure CNAME Inside SAAS Module
After mapping the domain with IP, the last task remains is to configure the domain name inside the saas module. For this, you have to login in super admin of SAAS module where you can enter your tenant actual domain name inside CNAME block. The entry should be like this in the image below:
Step-4: Test the Site (with update Cname)
Check in browser if the updated domain name is working or not.