Written by BuyNoir
Last updated: 2021-07-02
With the help of booking products, customers can easily purchase and book everything online including Appointments, Events, Rental, Tables Booking. Here we will discuss how to create booking products in buynoir.co.
By this product type, admin can manage all necessary details of the Booking product like date available, slot period, stock value and price settings and much more. So, let’s get started with how to create booking products in buynoir.co
Steps should be followed to create booking product:
Click on Catalog >> Products>>Select Booking under Product Type
Now once you will click on the Save Product button, you will be redirected to the next page where you will find the several new settings as shown in the previous general settings. This setting is almost same for all kind of products.
***Price: Insert the price, cost, special price and set the special price date for which special price will be shown on the website.
Point to be noted that** In event booking and rental booking product, this price work as the base price which will be added along with a per ticket for each quantity and per rent for each quantity.
To create the Booking Product, select the Booking type as per the choice. There are 5 below types of booking products. Let’s discuss one by one “How to create Booking Products in buynoir”.
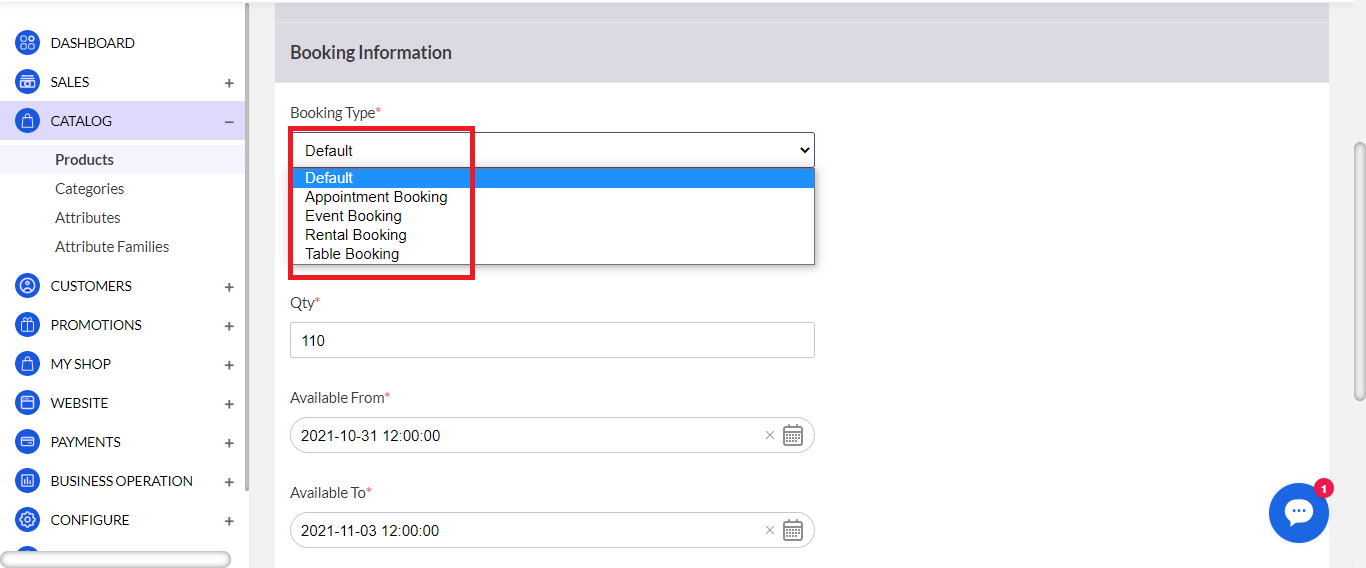
The admin can create a Default booking product as shown below in the screenshot. In default booking products there are two types.
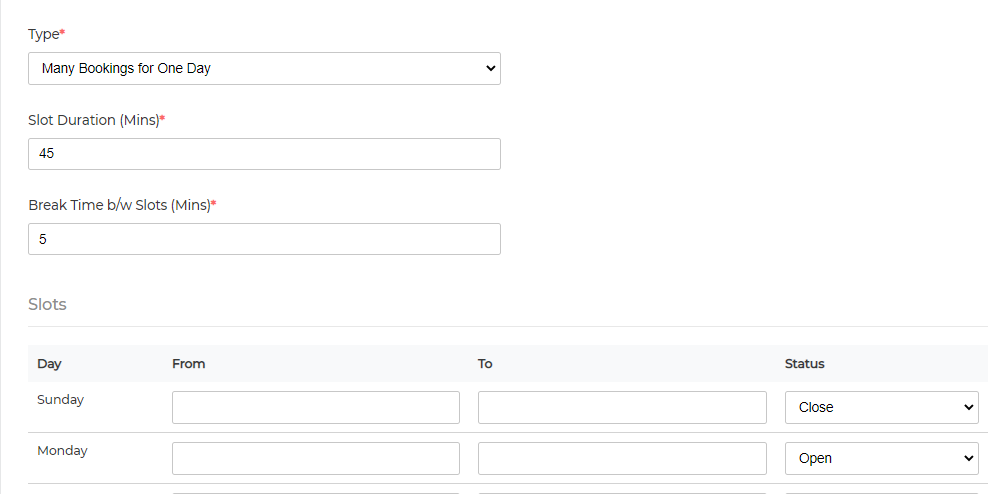
To create the many bookings for one day, configure the below booking detail.
Location: Enter the location for booking products.
Quantity: Enter the quantity of booking products. This is the global quantity for each slot.
Available from: Select the start date for the booking.
Available to: Select the end date for the booking.
Type: Select the type of booking One booking for many days.
Slot Duration (Mins): Set slot duration in a minute. By default, it is 45 min.
Break Time b/w Slots (Mins): Set the break time between slots in min. By default, it is 15 min.
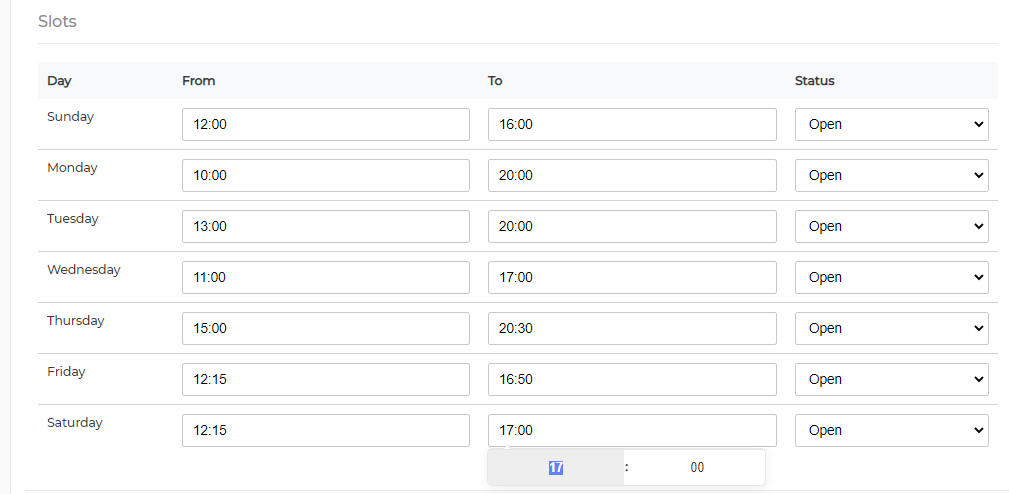
After that, you have to fill the slot timing as above image. And you can also enable or disable the slots then click on Save Product.
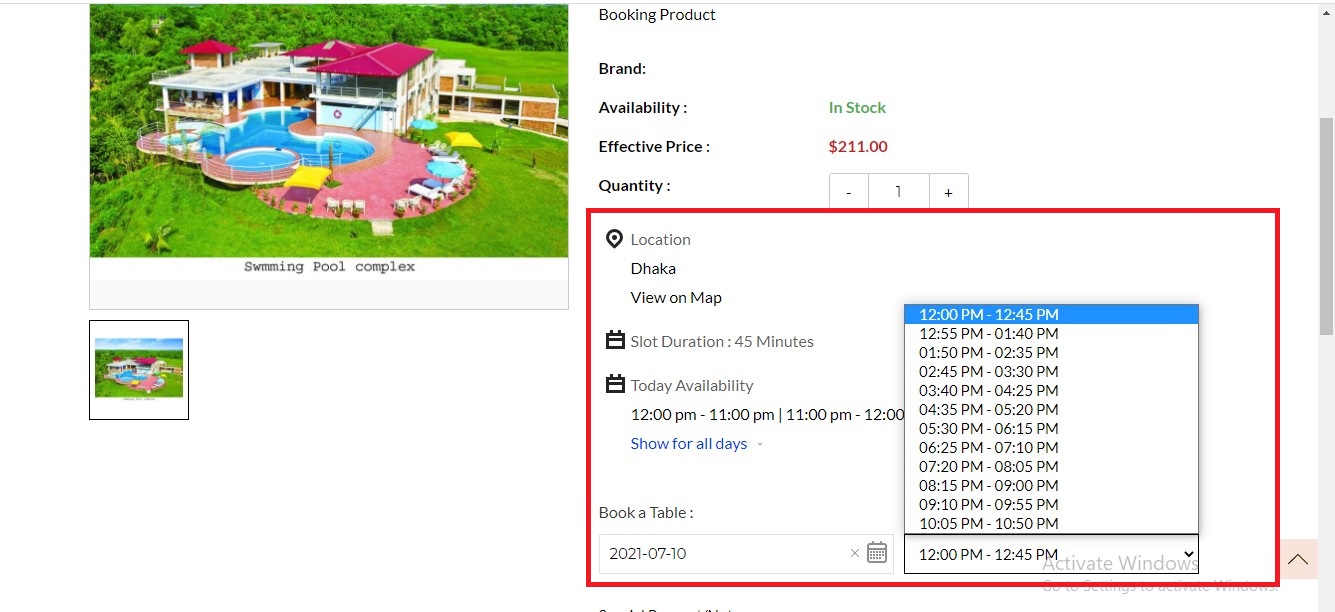
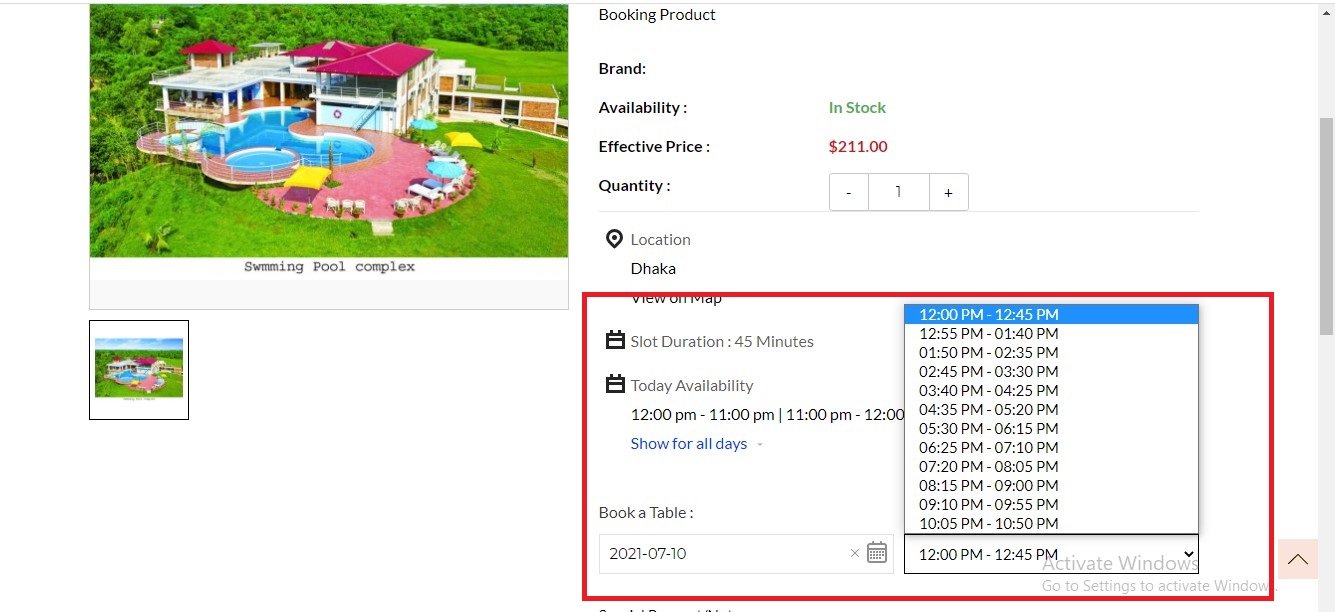
Here, you need to first select the date for which you want the booking. After that, you need to select the required slot. You can also view the location on google map.
The product will be like the below image:
To create the one booking for many days, configure the below booking detail.
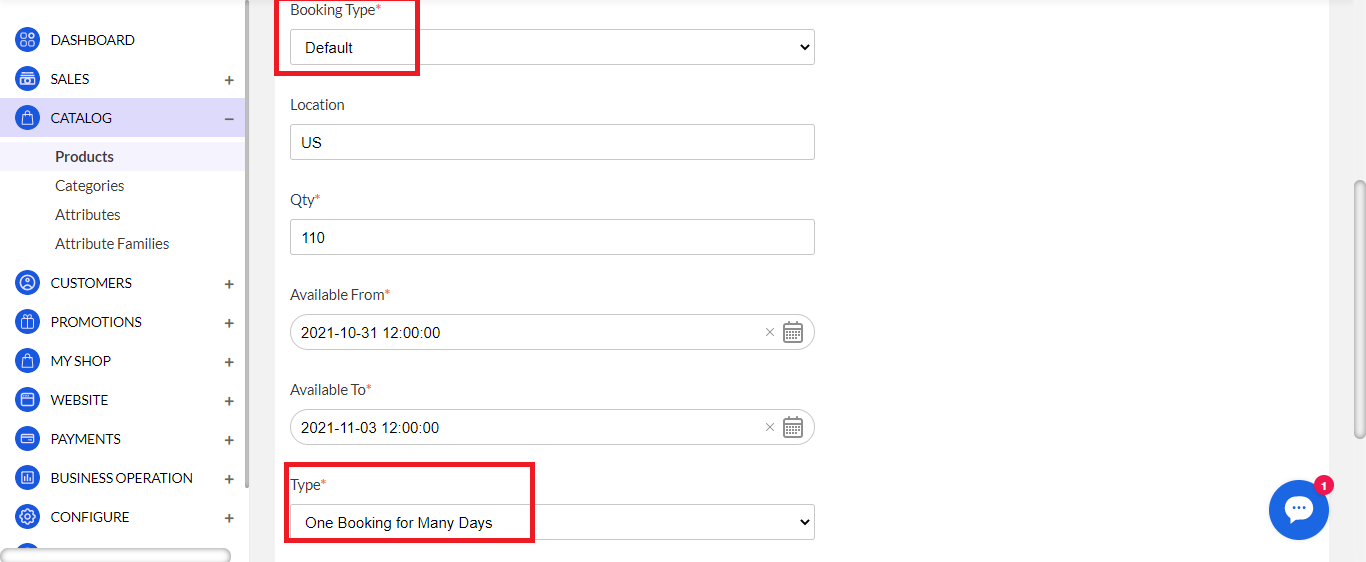
Location: Enter the location for booking products.
Quantity: Enter the quantity of booking products. This is the global quantity for each slot.
Available From: Select the start date for the booking.
Available To: Select the end date for the booking.
Type: Select the type of booking, Many booking for one day or One booking for many days.
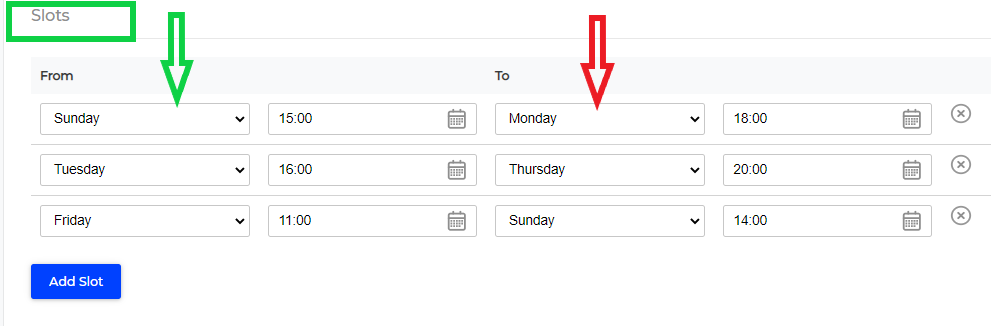
After that, you have to fill the slot timing from the start date to the end date. And you can add more slots by click on Add slot and you can also remove slots by click on the cancel icon then click on the Save Product.
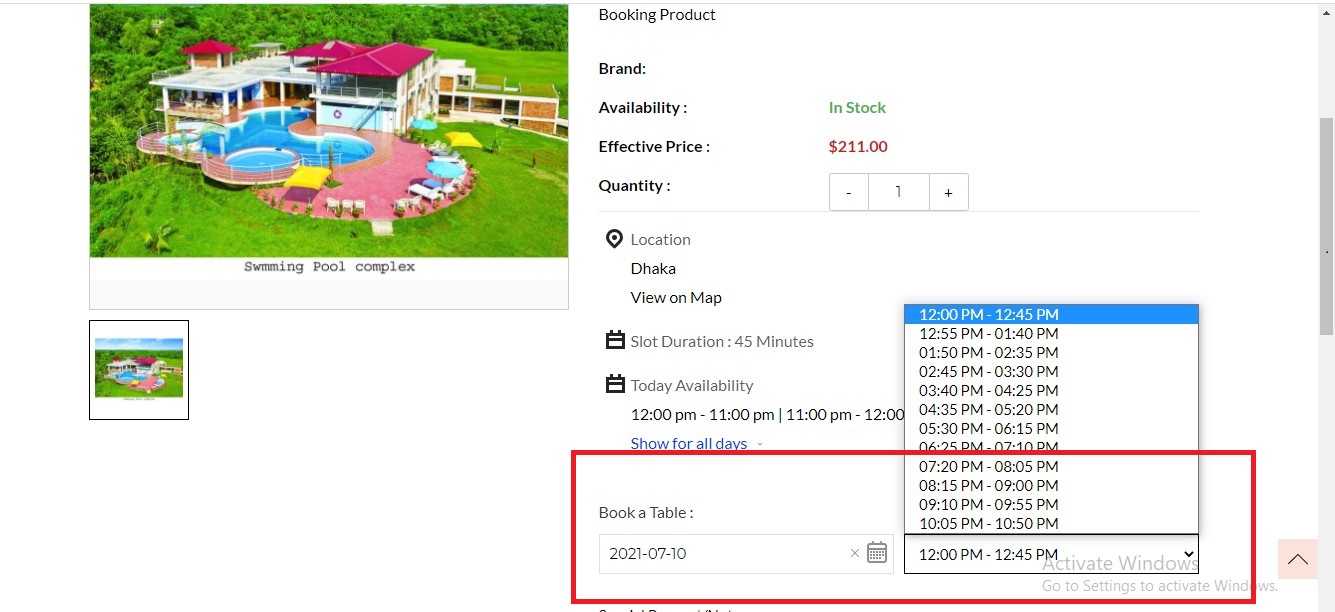
Here, you need to first select the date for which you want the booking. After that, you need to select the required slot. You can also view the location on google map.
The admin can create an Appointment booking product as shown below in the screenshot. Here Admin has to select the Appointment Booking type.
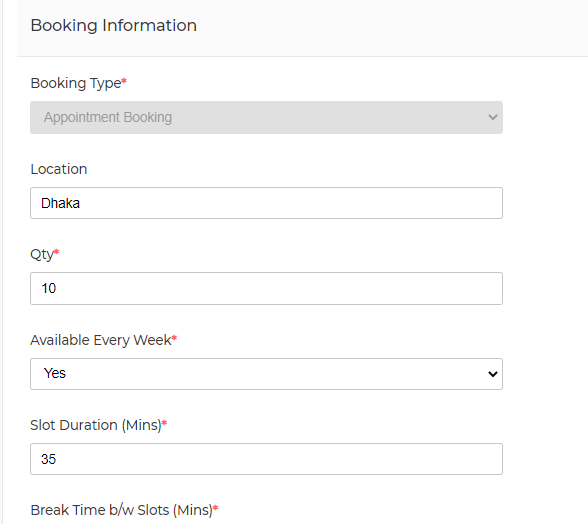
Location: Enter the location for Appointment booking products.
Quantity: Enter the quantity of booking products. This is the global quantity for each slot.
Available Every Week: Set “Yes” for configure time slots for all days of the week. if you don’t want to configure the time slots for all the days of the week set “No “. And configure the start date and end date.
Slot Duration (Mins): Set slot duration in a minute. By default, it is 45 min.
Break Time b/w Slots (Mins): Set the break time between slots in min. By default, it is 15 min.
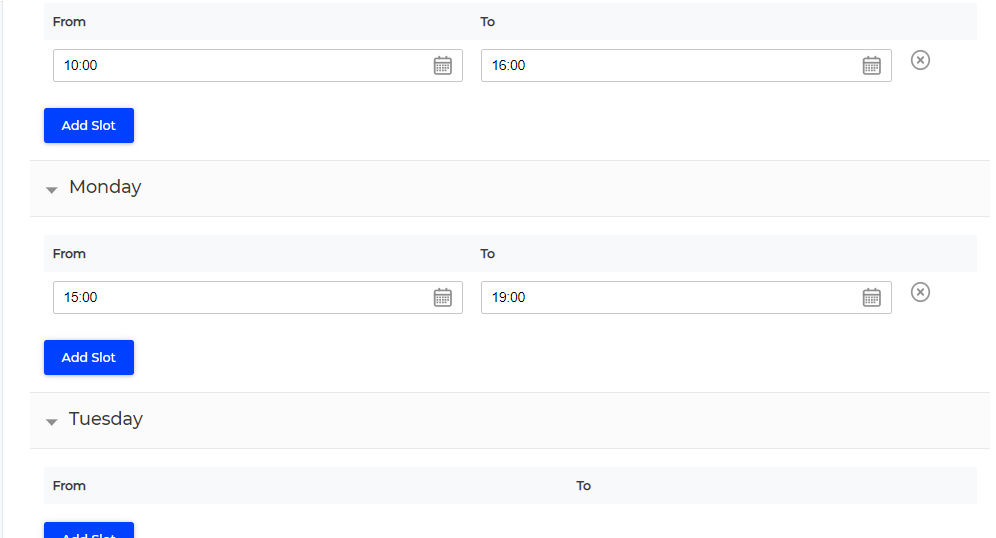
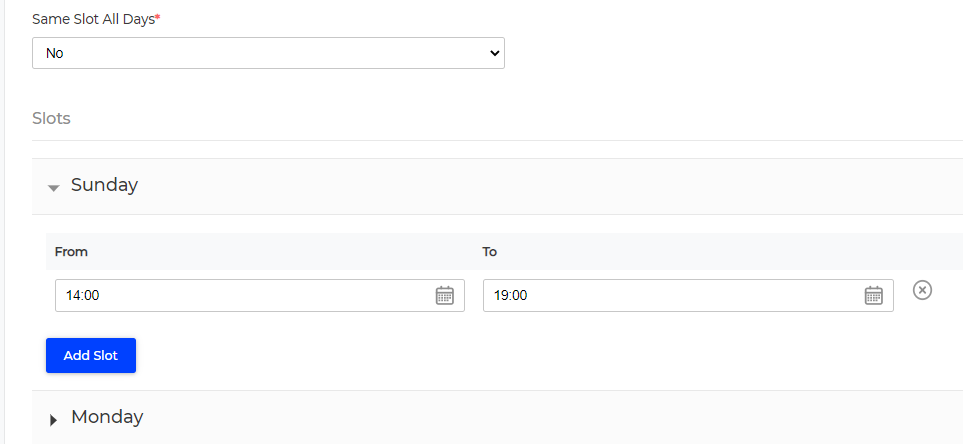
Same Slot All Days: Set “NO” for the same slot for all the days.
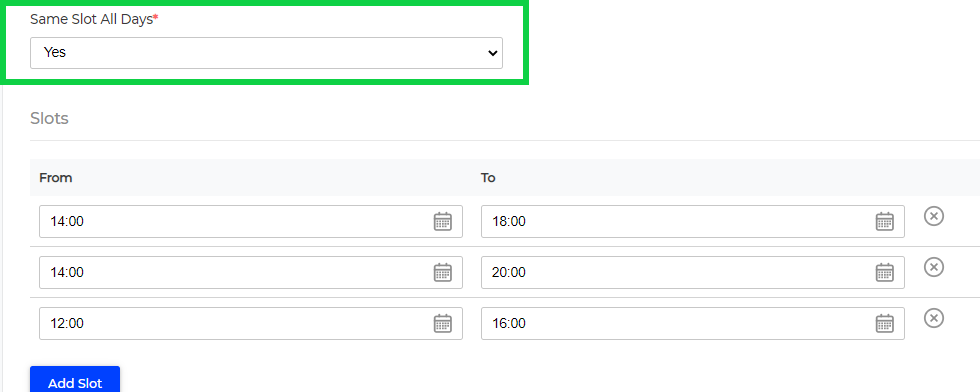
Same Slot All Days: Set “Yes” for the same slot for all the days.
After that, you have to fill the slot timing from the start date to the end date. And you can add more slots by click on Add slot and you can also remove slots by click on the cancel icon then click on the Save Product.
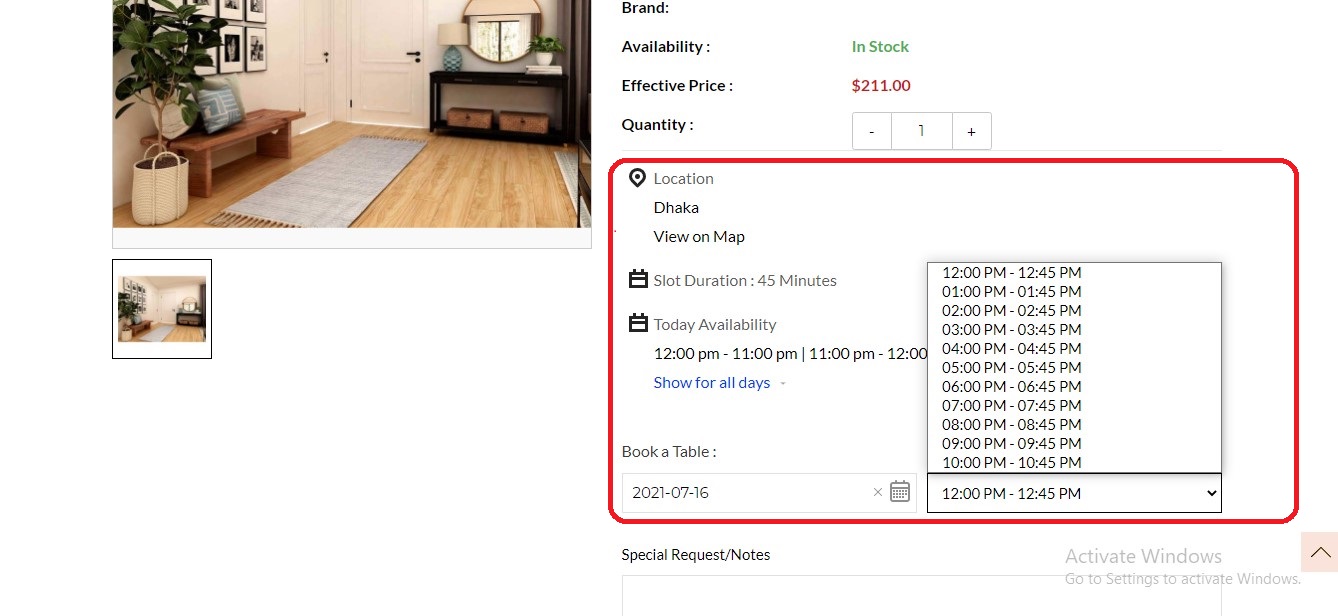
Here, you need to first select the date for which you want the booking. After that, you need to select the required slot. You can also view the location on google map. The website view looks like below this image:
These steps we just need to create an Appoint booking.
The Admin can create an Event booking product as shown below in the screenshot. Here Admin has to select the Event Booking type.
Location: Enter the location for Event booking products.
Available from: Select the start date for the booking.
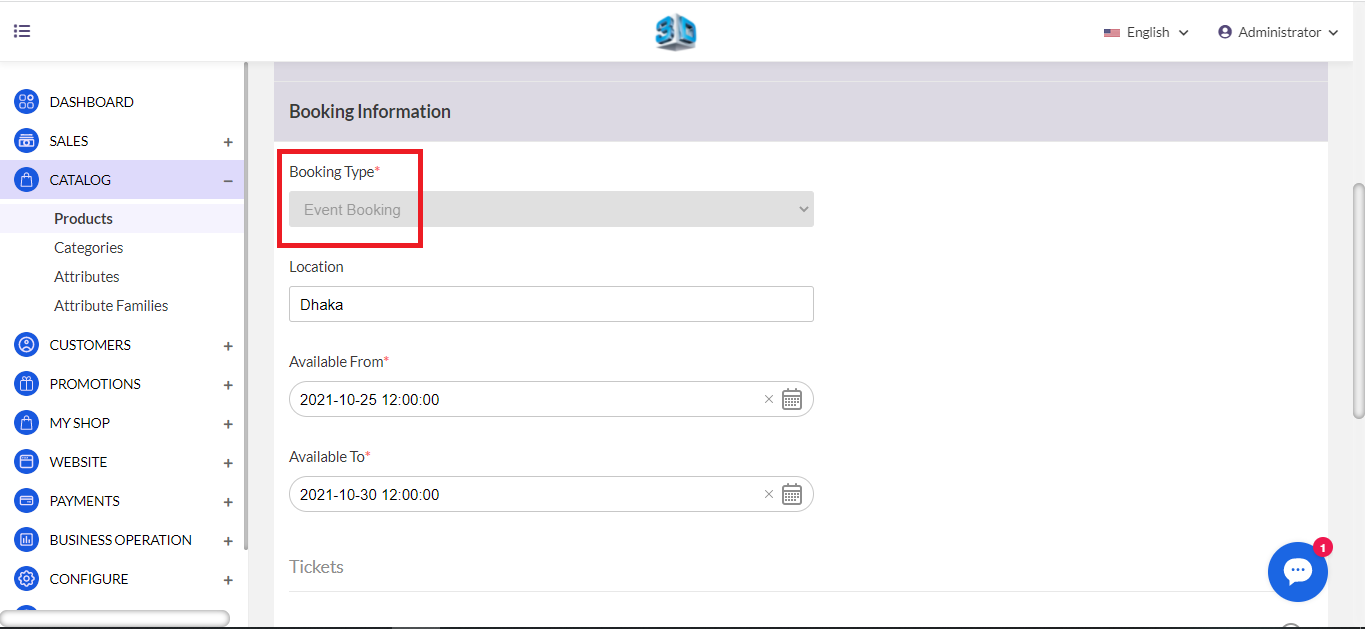
Available to: Select the end date for the booking.
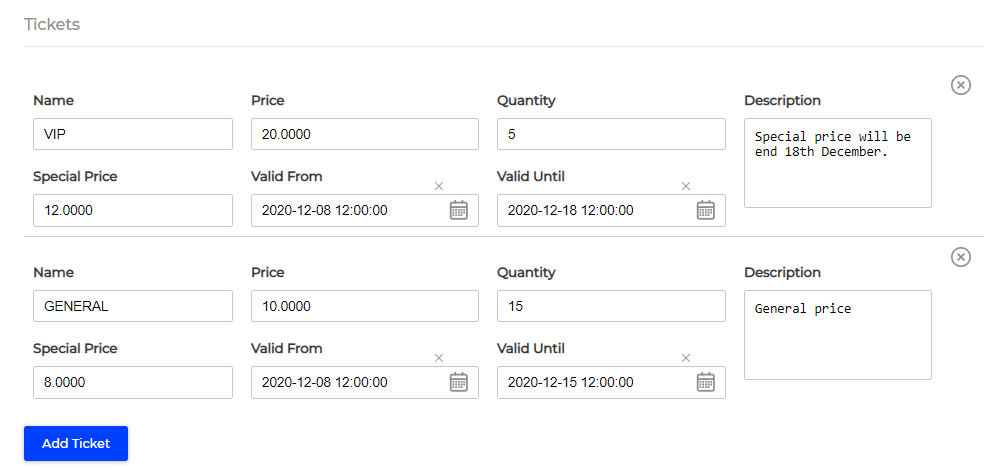
Now, fill the ticket detail like Name, price, quantity, and description as the above screenshot. You can also add more tickets by click on Add Ticket.
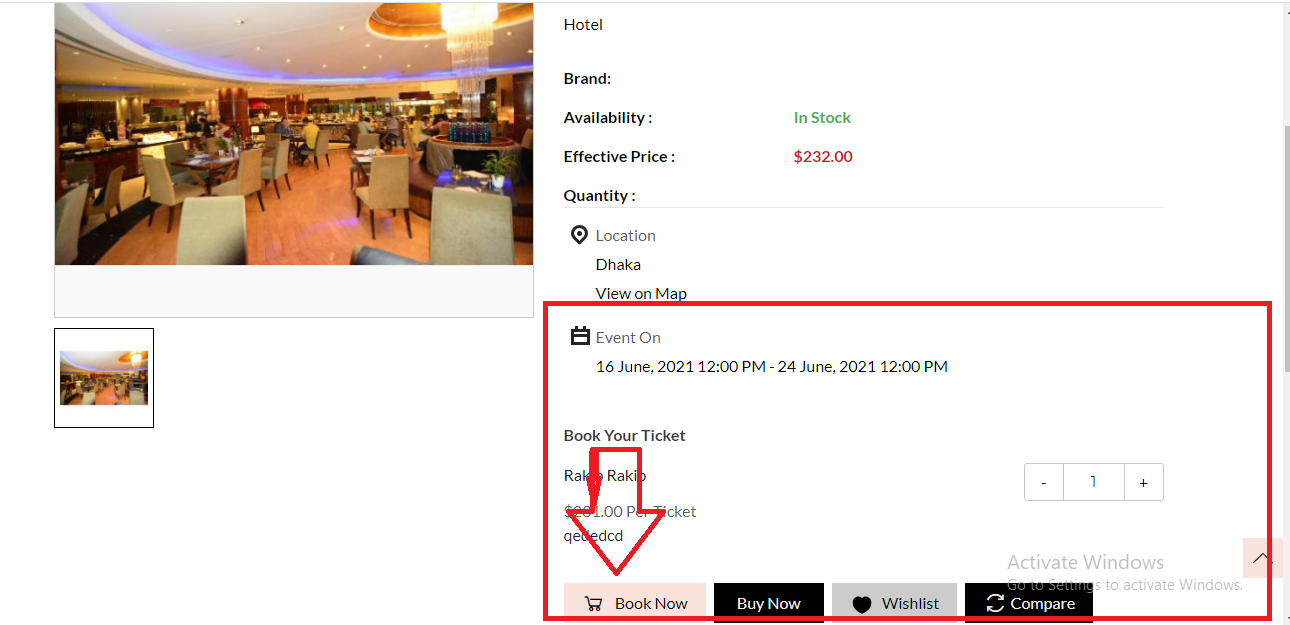
On the front end (Shop website), you have to select the ticket quantity. This base price will be applied to each type of ticket for each quantity. So, the total price will be in the below image is $12 for quantity 1.
These steps we just need to create an event booking.
The Admin can create a Rental booking product as shown below in the screenshot. Here Admin has to select the Rental Booking type.
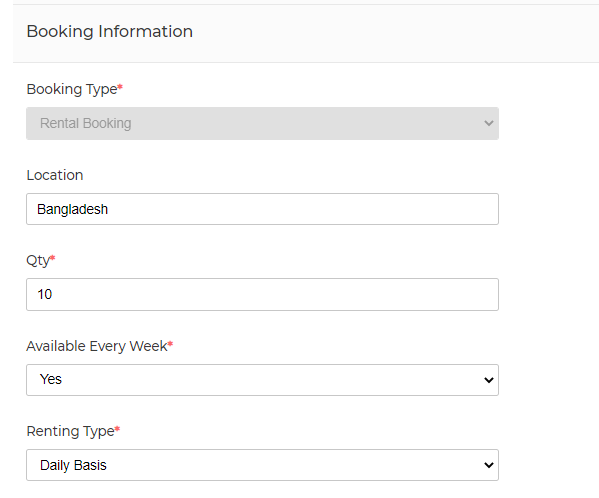
Location: Enter the location for Rental booking products.
Quantity: Enter the quantity of booking products. This is the global quantity for each slot.
Available Every Week: Set “Yes” for configure time slots for all days of the week. if you don’t want to configure the time slots for all the days of the week set “No “. And configure the start date and end date.
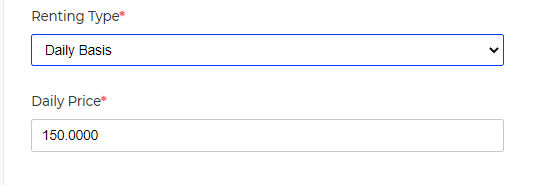
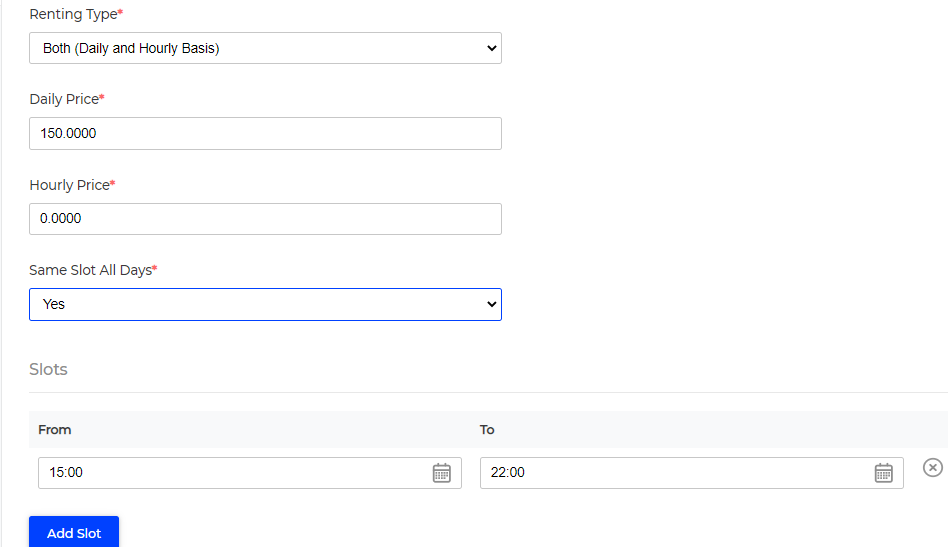
Renting Type: There are three Renting Type
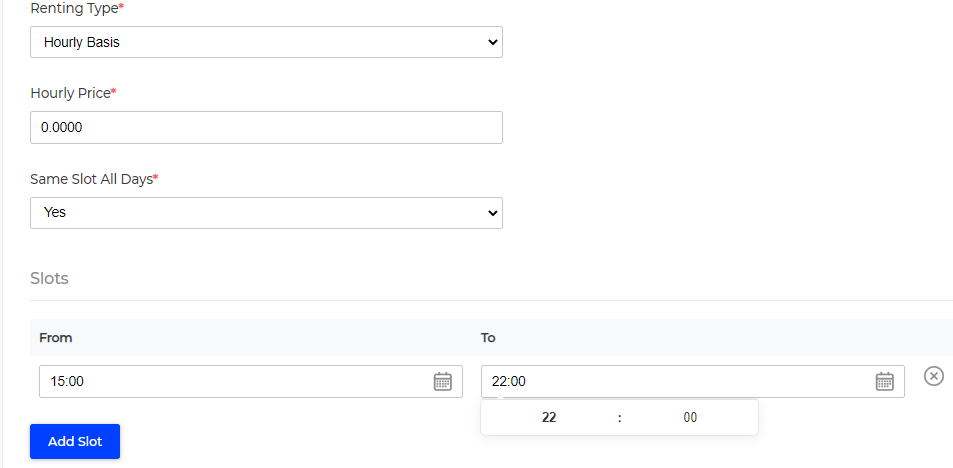
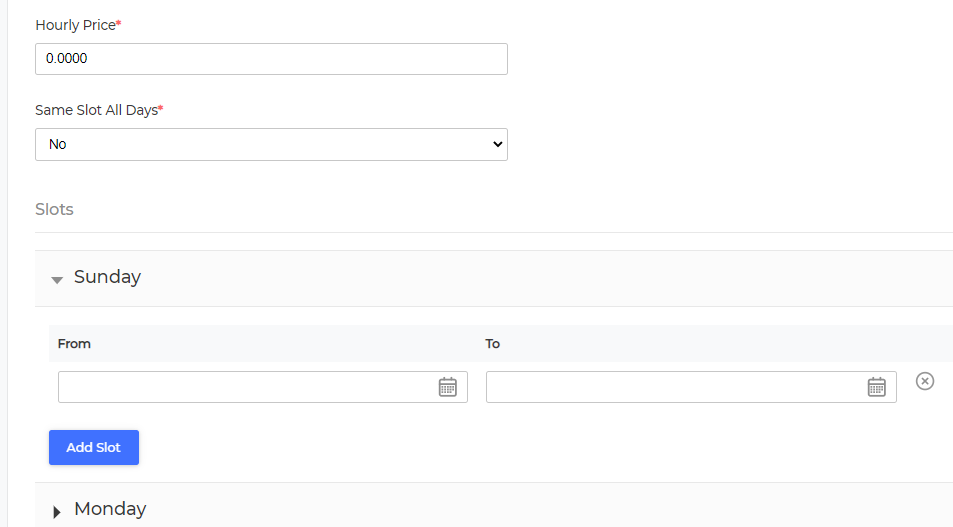
If you don’t want to configure the same time slots for all the days then set “NO “. We can add different days and different time slot. After that, you can set slot time days wise then click on Save Product
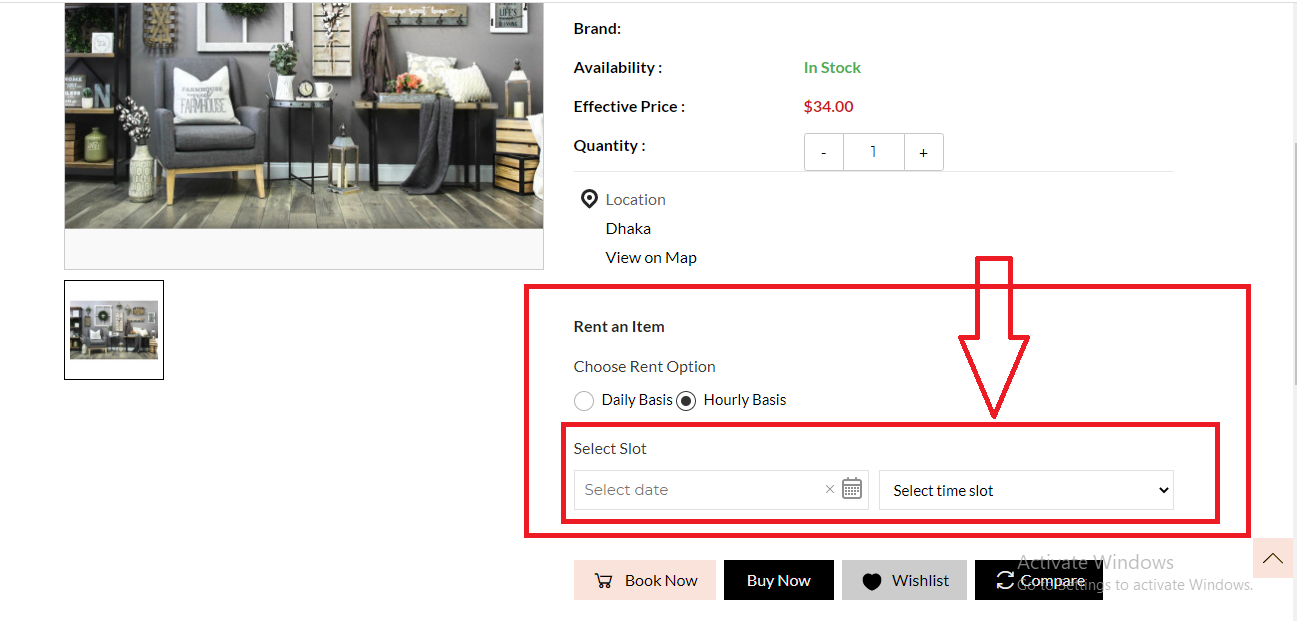
Here customer has to select the option to choose the Rent option from shop website either Daily Basis or Hourly Basis (if this is already configured in the backend).
Daily Basis: When the customer chooses the rent option as the Daily Basis, then the customer needs to select the dates as per their requirement of the rental product.
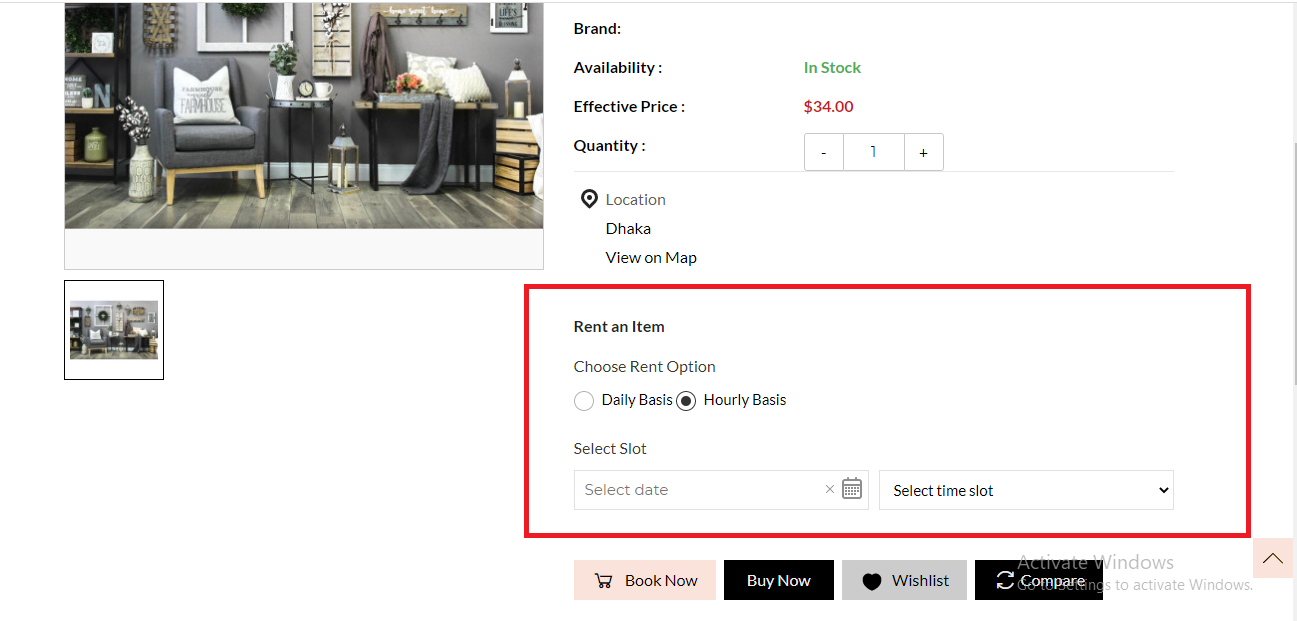
Hourly Basis: When the customer chooses the rent option from shop website as the Hourly Basis, then the customer needs to select the date, time slot, and select rent time duration. You can select the quantity from the shopping cart.
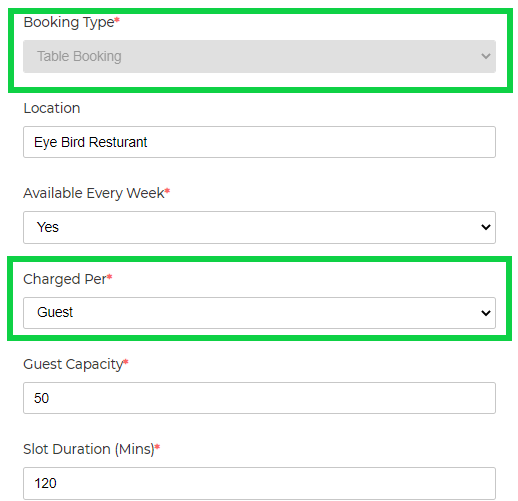
The admin can create a Table booking product as shown below in the screenshot. Here Admin has to select the Table Booking type.
Now Configure the Table booking detail.
Location: Enter the location for Table booking products.
Available Every Week: Set “Yes” for configure time slots for all days of the week. if you don’t want to configure the time slots for all the days of the week set “No “. And configure the start date and end date.
Charged Per: You can charge a basis like the per table or per guest. When you select per table then you have to enter Guest Limit Per Table. So that you can charge per table (4 guests) below image.
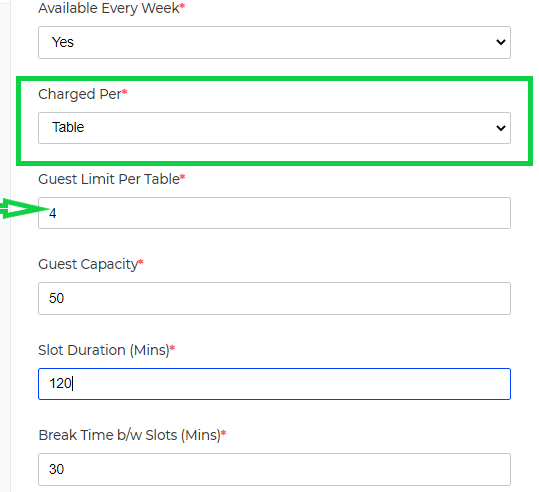
Guest Capacity: Set the maximum number of guests the table can be booked for.
Slot Duration (Mins): Set slot duration in a minute. By default, it is 45 min.
Break Time b/w Slots (Mins): Set the break time between slots in min. By default, it is 15 min.
Prevent Scheduling Before: Set the minutes to advance booking means that before the start time of the slot.
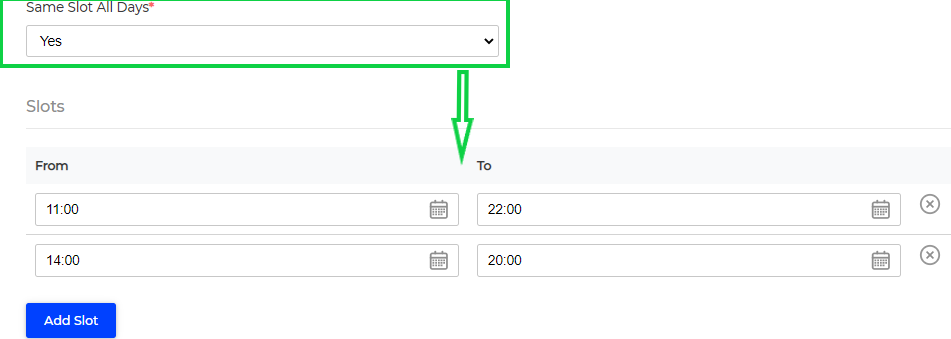
Same Slot All Days: Set “Yes” for the same slot for all the days.
If we select “Yes” Same slot for all the days. Given below the image:
Else set “No” for the different slots for each day. We need to set the slot day wise.
Here customer has to select the date and time and add a note for admin.
That’s all about we need to follow to create a booking product in Buynoir.